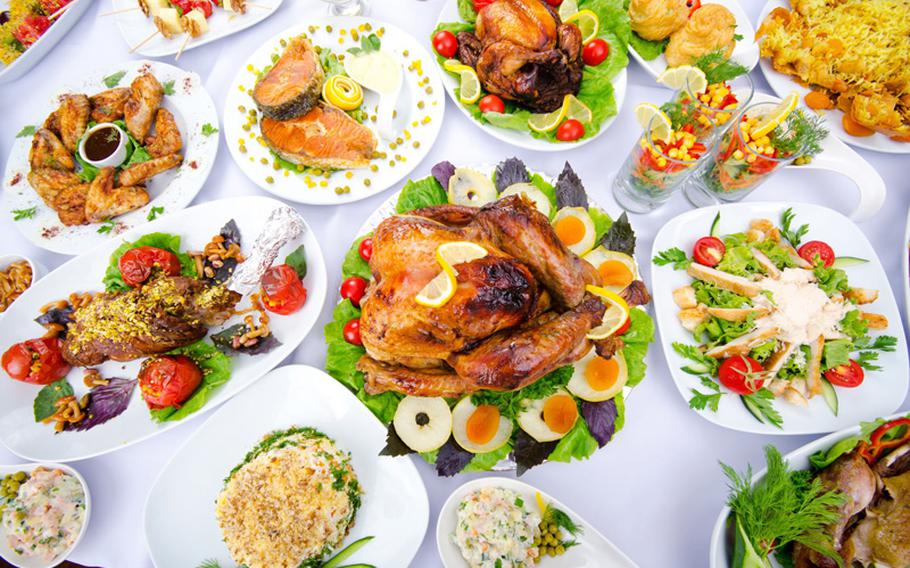
(Thanksgiving meal)
Seeing pink as you’re slicing into your beautifully browned holiday turkey is enough to strike fear into the heart of any cook, no matter how experienced they are. Follow these few tips to avoid that scene this holiday season.
First, make sure your turkey is completely thawed before being prepped for the oven. Thaw in the refrigerator, on a tray, to catch any juices; and allow five hours per pound to complete the thawing process. Depending on size, this can take from two to five days. To speed things up a bit, remove the giblet packet and neck from inside the turkey and thaw them separately. Be sure to check both the body cavity and the neck cavity for these – sometimes they are stored in two packets.
If time is short, leave the turkey in its original wrapper, place breast side down in a large container and cover completely with cold water. Change the water every 30 minutes and allow an hour per pound total thawing time.
If you don’t own an instant-read thermometer, put that at the top of your commissary shopping list. An oven-safe thermometer works, too, but it is simply not possible to judge doneness without one or the other. While you’re preparing the turkey for the oven, take note of its anatomy so you’ll be able to insert the thermometer properly.
Lift the leg and feel along the thigh to help visualize how deeply into the interior the thigh meets the body. Insert the thermometer into the thickest part of the thigh just beneath, but not touching the bone, reaching all the way down to the joint. Take note that the breastbone runs through the center of the breast from the neck to the body cavity. To test the breast meat, insert the thermometer parallel to the breastbone deep into the neck end of the breast where the meat is thickest.
The temperature you will roast to is somewhat a matter of preference. The breast is perfectly cooked when the thermometer reaches between 160 and 165 degrees. But the leg is a different story. At 170 degrees, the leg meat is safe to eat but will be firm and have a ruddy glow, with the thigh meat slightly stiff and pinkish. Continuing to roast to a temperature of 175 degrees will take care of those issues, but the breast meat will suffer from the longer roasting time. If you prefer not even a trace of pink, continue to roast to a temperature of 180. Just accept that the breast meat will be overdone, and be sure to offer plenty of good-tasting gravy.
How much to buy
Plan on 1 pound per person for a regular bone-in turkey; about 1/3 pound per person for a boneless breast or turkey roast. Allow more, if you want plenty of leftovers, or to accommodate guests who favor only white or only dark meat.
As with all raw meat, turkey can spoil quickly if not handled properly, so make the commissary the last stop on your holiday shopping trip. And make the turkey the last item placed in your grocery cart. At home, place the turkey in the refrigerator or freezer immediately.
How long to cook
Oven Roasted Turkey Cook until temperature reaches 170 degrees Fahrenheit in the breast and 180 F in the thigh. Cooking times are for planning purposes only - always use a meat thermometer to determine doneness. (Approximate Timetable for Roasting a Turkey at 325 degrees F)
Unstuffed Turkey Time to Cook
8 to 12 pounds 2 3/4 to 3 hours
12 to 14 pounds 3 to 3 3/4 hours
14 to 18 pounds 3 3/4 to 4 1/4 hours
18 to 20 pounds 4 1/4 to 4 1/2 hours
20 to 24 pounds 4 1/2 to 5 hours
24 to 30 pounds 5 to 5 1/4 hours
Stuffed Turkey Time to Cook
8 to 12 pounds 3 to 3 1/2 hours
12 to 14 pounds 3 1/2 to 4 hours
14 to 18 pounds 4 to 4 1/4 hours
18 to 20 pounds 4 1/4 to 4 3/4 hours
20 to 24 pounds 4 3/4 to 5 1/4 hours
24 to 30 pounds 5 1/4 to 6 1/4hours
How to thaw safely
In the refrigerator: Turkeys can be thawed using one of three methods, but the safest, most foolproof, and most recommended is to thaw them in the refrigerator. In addition to being the safest method, this will also result in the best finished product.
Plan ahead and allow about 24 hours for every 4 to 5 pounds of bird weight.
Place the turkey, in the original wrapper, on a shallow-rimmed baking sheet or platter in the refrigerator.
Refer to the following chart for estimated thawing times.
Refrigerator Turkey Thawing Time (40 degrees F) Turkey Weight Days to Allow for Thawing Turkey
8 to 12 pounds 2 to 2.5 days
12 to 16 pounds 2.5 to 4 days
16 to 20 pounds 4 to 5 days
20 to 24 pounds 5 to 6 days
The Cold Water Method: If planning fell short, and you need to thaw the turkey more quickly, use the cold water method.
Cover the turkey, still sealed in the original wrapper, with cold water.
Change the cold water every 30 minutes.
Allow about 30 minutes per pound for complete thawing, or refer to the following chart.
COLD Water Turkey Thawing Time Turkey Weight Hours to Allow for Thawing Turkey
8 to 12 pounds 4 to 6 hours
12 to 16 pounds 6 to 8 hours
16 to 20 pounds 8 to 10 hours
20 to 24 pounds 10 to 12 hours
The Microwave Method: Even though thawing can be safely done in the microwave, it is the least desired method for producing a good-quality finished product, and the turkey must be roasted immediately after thawing.
Follow your microwave manufacturer’s directions for thawing.
Roast the turkey immediately, once thawing is complete.
Unstuffed Oven Roasted Turkey
Ingredients
1 fresh or frozen (thawed) turkey
1 medium onion, quartered
1 small celery stalk with tender leaves attached, cut into 1–inch chunks
1 teaspoon dried thyme, 8 sprigs fresh (optional)
4 to 6 tablespoons vegetable oil or melted butter
Directions
Preheat oven to 325 degrees, and position the oven rack to the lowest level.
Remove the giblet package and neck from inside the bird. Set these aside for giblet gravy. Check both the neck cavity and body cavity for giblets; often these are stored in both places.
Pat the turkey dry both inside and out with paper towels. If desired, the turkey may be rinsed inside and out with cold running water and patted dry.
Rub the inside cavity generously with salt.
Place the onion, celery and thyme inside the body cavity. These add wonderful flavor, both to the meat and to the drippings, which you’ll use later for giblet gravy. Discard the onion and celery, once the turkey is roasted.
With the turkey breast–side–up, bring the loose skin at the neck opening to the back of the turkey. Hold the skin in place by folding the wing tips under the back. Tuck the legs under the band of skin near the tail, or tie together with heavy string.
Place the prepared turkey, breast–side–up, on a rack in a shallow roasting pan, and generously brush the skin with melted butter or vegetable oil.
If an oven–safe meat thermometer is used, insert it in the center of the inside thigh muscle, making sure the bulb does not touch bone.
Roast uncovered according to the roasting chart for your size turkey, or until the temperature as measured in the thickest part of the thigh reaches 175 to 180 degrees.
When the bird is two–thirds done, cut the band of skin or string between the legs so thighs will cook evenly.
Remove turkey from the oven, tent loosely with foil, and let rest 20 minutes before carving.
Turkey Tips
If using a turkey labeled “pre-basted,” self-basting,” or “kosher,” the additional salt called for in Step 4 is not necessary. Basting is also not necessary, but can be done, if desired.
Try to match the size of the pan to the size of your turkey. If the pan is too deep it will shield the thickest part of the turkey thighs from the heat causing them to cook unevenly.
The turkey breast can be tented with aluminum foil (shiny side out) to prevent it from browning too fast or overcooking. Remove the foil during the last 45 minutes of roasting. The back part of the oven is usually the hottest, so placing the turkey with the legs toward the back and breast toward the oven front may also be helpful.
Best results will be obtained if heat is able to circulate completely around the turkey, so be careful not to overcrowd the oven with other dishes baking at the same time.
A turkey can be roasted at a higher oven temperature (see High-Heat Roasted Turkey) but, for safety sake, do not use a temperature lower than 325 degrees.
Old-Fashioned Bread Stuffing
Ingredients
1 cup finely chopped celery
1/2 cup chopped onion
1/2 cup butter or margarine
1 teaspoon poultry seasoning or sage
1/2 teaspoon salt
1/8 teaspoon pepper
8 cups dry bread cubes, substitute 1 (16-ounce) bag regular or cubed herb-seasoned stuffing, if desired
3/4 to 1 cup chicken broth or water
Directions
In a saucepan, cook celery and onion in butter until tender but not brown; remove from heat and stir in poultry seasoning or sage, salt and pepper.
Place the dry bread cubes in a large mixing bowl. Add the onion mixture.
Drizzle with enough broth or water to moisten, tossing lightly.
Use to stuff one 10-pound turkey. May also be baked as dressing – bake at 350 degrees for 30 to 40 minutes.
Variations
Mushroom Stuffing: Add 2 (4-ounce) cans sliced mushrooms, drained, or 1 cup sliced fresh mushrooms cooked with the celery-onion mixture.
Raisin Stuffing: Add 3/4 cup raisins with the seasonings.
Oyster Stuffing: Add 1 pint shucked oysters, drained and chopped, or 2 (8-ounce) cans whole oysters, drained and chopped, with the seasonings.
Chestnut Stuffing: Add 1 pound (about 3 cups) roasted chestnuts with the seasonings. Slash shells of chestnuts with a sharp knife, roast on a baking sheet in a 400 degree oven for 15 minutes. Cool, peel, and coarsely chop.
Yields: 8-10 servings
Giblet Gravy
Ingredients
Giblets and neck from turkey
3 or more stalks of celery with leaves
1/2 medium onion, thinly sliced
1/2 cup all-purpose flour
Salt and pepper to taste
Directions
Remove giblets from paper wrap and rinse with cold running water, set liver aside.
In a medium saucepan place giblets and neck in lightly salted water to cover; add the celery leaves and onion slices for flavor. Cover and simmer for 1 hour or till tender.
Add the liver, if desired, and continue to simmer for 20 to 30 minutes.
Remove and chop liver and giblets, discard the neck. Remove the celery leaves and any whole pieces of onion from the broth.
For gravy, add enough canned chicken broth, or broth and drippings from roasted turkey to measure 2 cups, and bring the mixture to a gentle simmer.
In a screw-top jar combine 1 cup of cold water with the flour and shake till very well combined and no flour lumps remain. Stir into the simmering broth and cook and stir till thickened and bubbly.
Cook 1 to 2 minutes more.
Season with salt and pepper to taste.
Stir in chopped giblets and serve.
Note The liver adds a distinctive and sometimes strong flavor to the gravy. If this doesn’t appeal to your taste, it can be left out entirely. Add the flour/water mixture slowly to the broth just until it reaches the consistency you like – it should be neither too thick nor too thin. Carefully stir in a little more broth, if the gravy becomes too thick.
Walnut, Apple Stuffing
.jpg/alternates/LANDSCAPE_910/Apple_Walnut_Stuffing_4174345647.jpg)
Walnut, Apple Stuffing (Defense Commissary Agency)
Ingredients
1 cup shredded carrot
1 cup chopped celery
1/2 cup chopped onion
1/2 cup butter or margarine
1 teaspoon ground sage or poultry seasoning
1/2 teaspoon salt
1/4 teaspoon ground cinnamon
8 cups dry bread cubes
2 cups finely chopped, peeled apple
1/2 cup chopped walnuts
1/4 cup wheat germ
1/2 to 3/4 cup chicken broth
Directions
In a skillet, cook carrot, celery and onion in butter or margarine until tender but not brown.
Stir in sage or poultry seasoning, salt, cinnamon and 1/8 teaspoon pepper.
In a large mixing bowl, combine bread cubes, chopped apple, walnuts and wheat germ. Add cooked vegetable mixture.
Drizzle with enough chicken broth to moisten, tossing lightly.
Use to stuff one 10-pound turkey. May also be baked as dressing – bake at 350 degrees for 30 to 40 minutes.
Yields: 10 servings
Pan Gravy for Roast Turkey
Ingredients
Roast turkey
Hot drippings
1/4 cup all-purpose flour
2 cups water or chicken brothe
Directions
Remove roast turkey to a serving platter; keep warm.
Leaving crusty bits in the roasting pan; pour pan drippings into a large measuring cup.
Skim off and reserve fat from the pan drippings. (To skim the fat from the drippings, tilt the measuring cup and spoon off the oily liquid that rises to the top.)
Return 1/4 cup of the fat to the roasting pan; discard any remaining. Stir in flour.
Cook and stir over medium heat till bubbly. Remove pan from heat.
Add enough water or chicken broth to the drippings in the liquid measuring cup to equal 2 cups total liquid.
Add all at once to flour mixture in pan. Return pan to heat and cook and stir until thickened and bubbly. Cook and stir 1 to 2 minutes more.
Season to taste with salt and pepper.
Yields: 2 cups
Deep Fried Turkey
Ingredients
1 (8 to 10 pound) whole turkey, completely thawed
5 gallons peanut oil or special high-smoke point blend made for turkey fryers (less oil may be required for electric fryers)
Liquid seasoning and injector (optional)
Dry rub seasoning (optional)
Directions
To find the level of oil needed, place the turkey, in the original wrapper, inside the fryer. Add water until it reaches 1 to 2-inches above the turkey. Remove the turkey, and use a ruler to measure the distance from the top of the pot to the surface of the water. Write down the measurement this is how full you must fill the pot with oil.
Drain or pour out the water and thoroughly dry the pot, including the drain spout, if your fryer has one. This step is best done a day or more before fry-time so there is no chance of moisture remaining in the pot.
Fill the pot with the required amount of oil, and heat to 365 to 375 degrees. This will take 45 minutes to 1 hour. The fry guy should stay with the heating oil, while the other half of the team prepares the turkey.
Remove the giblet package and neck from inside the bird. Check both the neck cavity and body cavity for giblets; often these are stored in both places.
Thoroughly dry the turkey inside and out with paper towels.
Trim excess skin from the neck and body cavity openings to allow oil to flow through the turkey as it cooks.
Clip and remove the band of skin or any wire or plastic truss holding the legs in place.
Cut off the wing tips at the first joint, and cut off the tail.
Inject liquid seasoning deep into the breast, leg and thigh muscles. Do not inject liquid seasoning under the skin this will cause popping and spattering when the turkey is lowered into the hot oil.
Generously rub the skin and inside the body cavity with dry seasoning, if desired.
When oil has reached the target temperature, place the turkey upside down (with feet facing up) on the poultry rack, or in the fryer basket, (if using electric fryer) and slowly lower into the hot oil.
Adjust the heat as necessary to maintain the oil at a constant 350 degrees.
Cooking time is 3 to 4 minutes per pound, so check for doneness after 25 to 30 minutes. Lift the turkey above the oil line, and check the internal temperature with an instant-read thermometer. The turkey is done when the temperature in the thickest part of the thigh reaches 175 to 180 degrees.
Carefully remove the turkey from the fryer, drain on paper towels, and allow to rest 15 minutes before carving.
Grill-Roasted Turkey
Ingredients
1 (12 to 14 pound) whole turkey, completely thawed
4 to 6 tablespoons vegetable oil
6 cups mesquite or hickory wood chips (optional)
Good quality charcoal briquettes
22-inch kettle-style or other covered charcoal grill
Directions
Place wood chips or chunks in a large bowl, cover with cold water and soak for 30 minutes to 1 hour. Drain and set aside.
Apply a thin coating of vegetable oil to the clean grill grate. Set bottom grill vents to the fully open position.
Place 70 charcoal briquettes on one side of the grill and ignite. Place a drip pan on the opposite side, and place the oiled grill grate into position.
Allow coals to develop a light coating of gray ash - about 25 to 30 minutes.
While the grill is heating, prepare the turkey. Remove the giblet package and neck from inside the bird. Check both the neck cavity and body cavity for giblets; often these are stored in both places.
Pat the turkey dry both inside and out with paper towels. If desired, the turkey may be rinsed inside and out with cold running water before patting dry.
Trim the excess skin and fat around the neck and body cavities, so juices may drain freely. The tail may also be removed, if desired.
Brush the skin generously with vegetable oil.
When the coals are ready, place the turkey, breast-side-down, directly on the grill grate. The turkey should be on the side opposite from the coals and directly over the drip pan.
Sprinkle 3 cups of the soaked and drained wood chips directly over the hot coals.
Place the lid on the grill, position the lid vents over the turkey, and open them halfway. Copious amounts of smoke will soon be pouring out of the vents. Don’t open the lid - this is normal.
At the 1-hour mark, remove the lid from the grill. With a thick wad of paper towel in each hand, grasp the turkey, flip it breast-side-up, and turn on the grill grate so that the leg and wing that were facing the coals are now facing away.
Add 15 briquettes to the hot coals, and sprinkle the remaining half of the soaked and drained wood chips over the fire.
At the 2-hour mark, remove the grill lid. Using thick wads of paper towel, as before, turn the turkey again so that the leg and wing that were facing the fire are now facing away. The turkey remains breast-side-up.
Insert an instant- read thermometer into each thigh. If thigh is close to target temperature (175 to 180 degrees), cover the grill, continue roasting, and check again in about 15 minutes.
If the temperature is still well below target (145 degrees or lower), add another 15 briquettes to the coals, cover the grill, and continue roasting for another 45 minutes before checking for doneness again.
When internal temperature of both thighs reaches 175 to 180 degrees, remove the turkey from the grill, tent loosely with foil, and let rest for 20 minutes before carving. Expect the finished turkey to be a deep mahogany brown.
Grill Roasting Tips
Get the right turkey - one that weighs no more than 12 to 14 pounds. A larger bird will produce burnt skin and undercooked meat. The shape of the turkey is almost as important as the weight. A turkey that is broad and flat will fit better under the covered grill top than one that protrudes too high in the breast area. There should be at least 1 inch of space between the turkey and the lid.
Don’t stuff the turkey - this will also lead to burnt skin and undercooked meat. Don’t truss the turkey either; leave both the body and neck cavities open so juices can drain.
Placement of the turkey on the grill is crucial - hot coals go on one side and the turkey goes on the other side, strategically placed over a disposable drip pan.
Avoid opening the lid or turning the bird any more than instructed. Substantial heat is lost each time the lid is opened.
Use a thermometer to check for doneness! Smoking can give the meat a pink tinge, which makes it close to impossible to tell if the meat “looks” done. An instant-read thermometer is great if you have one.
Total cooking time is about 2 1/2 to 3 hours, but could take longer if the weather is cold, windy or rainy.
Steamed Green Beans and Mushrooms
Ingredients
1 pound fresh green beans, washed with stem ends removed
4 to 5 fresh mushrooms, brushed clean with paper towel and sliced
Directions
Bring about 2 inches of water to a boil in a large pot fitted with a steamer basket. Be sure the water does not touch the bottom of the basket.
Add the vegetables to the basket – green beans on bottom and mushrooms on top.
Cover with a tight fitting lid and steam about 8 minutes or until beans are tender-crisp.
Roasted Winter Vegetables
Ingredients
2 pounds fresh vegetables of your choice cut into 1- to 2-inch chunks
1 tablespoon vegetable oil
1/2 teaspoon salt
1/4 teaspoon pepper
1 tablespoon chopped fresh rosemary, sage or thyme, or 1 teaspoon dried herbs (optional)
Directions
Preheat oven to 450 degrees. Lightly coat a rimmed baking sheet with vegetable cooking spray.
Whisk the oil, salt, pepper and herbs together in a large bowl. Add the vegetables and toss to coat well.
Spread vegetables in a single layer on baking sheet, and roast for 20 to 30 minutes.
Sweet Potato Casserole
Ingredients
5 to 6 medium sweet potatoes
1 stick of butter
¾ cup orange juice
1 teaspoon finely grated orange zest
1 cup evaporated milk or heavy cream
1½ cups sugar
1 teaspoon of cinnamon
1 teaspoon of vanilla extract
2 eggs
Pecan Crumble Topping:
2 cups all-purpose flour
½ cup sugar
10 tablespoons (1 stick plus 2 tablespoons) cold butter
1 cup finely chopped pecans
Directions
Wash and dry sweet potatoes. Place whole potatoes in a 9x13-inch foil lined pan and bake at 350 degrees for 1 to 1½ hours, until very soft when squeezed.
Prepare Pecan Crumble Topping while potatoes cool.
Combine flour and sugar well, add cold butter cut into small chunks.
Using a pastry blender or a fork, cut butter into flour mixture until mixture resembles coarse cornmeal.
Add the finely chopped pecans and mix well. Set mixture aside.
When potatoes are cool enough to handle, remove the peel, and measure into a large bowl. You should have 6 cups, firmly packed potatoes.
Add the butter, orange juice, orange zest, evaporated milk or cream, sugar, cinnamon, vanilla and eggs to the sweet potatoes.
Beat with an electric mixer until well blended.
Spread evenly into a 9x13-inch pan and top with the pecan crumble mixture.
Bake 45 minutes to 1 hour at 350 degrees.
Simple Pumpkin Soup
Ingredients
3 tablespoons butter
1/2 cup very finely minced onion
2 cups cooked mashed pumpkin (use canned pumpkin, if desired)
1 teaspoon salt
1/4 teaspoon ground pepper
1 tablespoon sugar
1/4 teaspoon nutmeg
3 cups chicken broth
1/2 cup half-and-half
Toasted pumpkin seeds for garnish
Pecan Crumble Topping:
2 cups all-purpose flour
½ cup sugar
10 tablespoons (1 stick plus 2 tablespoons) cold butter
1 cup finely chopped pecans
Directions
Heat the butter in a large saucepan or soup pot over medium heat.
Add the minced onion and cook until tender, but not brown.
Stir in the pumpkin, seasonings and chicken broth, stirring until soup is smooth.
Stir in the half-and-half and heat, stirring occasionally, until soup is steaming hot. Do Not Boil.
Ladle into soup dishes, sprinkle with toasted pumpkin seeds and serve.
Yields: Serves 4
Cranberry-Orange Relish
Ingredients
2 medium oranges
4 cups fresh cranberries (1 pound)
2 cups sugar
1/4 cup finely chopped walnuts
Directions
With a vegetable peeler, remove the orange portion only, of the peel of one orange; set aside.
Using a sharp knife, completely peel and section both oranges. Be careful to remove all the bitter white pith on the underside of the peel and the membrane between each orange section.
Using a food processor or blender with a coarse blade, grind reserved orange peel, orange sections, and cranberries.
Stir in sugar and nuts.
Chill for several hours or overnight before serving.
Cranberry Salad Mold
Ingredients
1 (3 ounce) package cherry-flavored gelatin
1 cup boiling water
1 (16 ounce) can whole cranberry sauce
1/2 cup diced celery
1/4 cup diced walnuts
1 cup sour cream
Directions
In a bowl, add boiling water to gelatin and stir until completely dissolved, about 2 minutes. Stir in the cranberry sauce.
Refrigerate mixture for 20 to 30 minutes until partially set (about the consistency of unbeaten egg whites.)
Gently fold in the celery, walnuts and sour cream until mixed well.
Pour into 6 1/2 cup mold and refrigerate 4 hours or until firm.
Unmold onto to serving plate and serve.
Pecan Pie
Ingredients
3 eggs
2/3 cup sugar
Dash salt
1 cup dark corn syrup
1/3 cup butter or margarine, melted
1 cup pecan halves
Pastry for Single-Crust Pie
Directions
Preheat oven to 350 degrees F.
In a mixing bowl beat eggs slightly with a fork.
Add sugar and salt; stir till dissolved.
Stir in dark corn syrup and melted butter or margarine; mix well.
Stir in the pecan halves.
Pour into pastry lined 9-inch pie plate.
Cover edge of crust with foil.
Bake at 350 degrees F for 25 minutes.
Remove foil; bake for 25 minutes more or till knife inserted off-center comes out clean.
Cool. Cover and chill to store.
Tip To prevent a soggy crust, sprinkle a pinch of flour or cornmeal over the bottom of pie plate before covering with piecrust, and bake the pie on a preheated cookie sheet or pizza stone. Cool pie on a wire rack.
Pumpkin Pie
Ingredients
1 16-ounce can pumpkin
3/4 cup sugar
1 teaspoon ground cinnamon
1/2 teaspoon ground ginger
1/2 teaspoon ground nutmeg
3 eggs
1 5 1/3 ounce can (2/3 cup) evaporated milk
1/2 cup milk
Pastry for Single-Crust Pie
Directions
Preheat oven to 375 degrees F.
In a large mixing bowl combine pumpkin, sugar, spices and 1/2 teaspoon salt.
Add eggs; with a fork, lightly beat eggs into pumpkin mixture.
Add the evaporated milk and milk; mix well.
Pour into a pastry lined 9-inch pie plate; cover edge of piecrust with foil.
Bake at 375 degrees F for 25 minutes.
Remove foil, bake for 25 to 30 minutes more, or until knife inserted off-center comes out clean.
Cool. Cover and chill to store.
Tip To prevent a soggy crust, sprinkle a pinch of flour or cornmeal over the bottom of pie plate before covering with piecrust, and bake the pie on a preheated cookie sheet or pizza stone. Cool pie on a wire rack.
Whipped Sweet Potatoes with Caramelized Apples
Ingredients
4 large sweet potatoes, cleaned and pierced several times with the tines of a fork
1/4 cup (1/2 stick) unsalted butter, divided
2 tablespoons heavy cream
1/2 cup applesauce
2 teaspoons fresh ginger, peeled and grated
1 teaspoon coarse salt
Freshly ground black pepper
2 apples (about 1 pound), peeled, cored, and cut into 1-inch pieces
3 tablespoons granulated sugar
Directions
Preheat oven to 375 degrees. Arrange potatoes on a baking sheet and bake until tender, about 1 hour 10 minutes to 1 hour 20 minutes. Remove from oven and let stand until cool enough to handle.
Cut each potato in half lengthwise, and scoop the flesh into a large mixing bowl. Discard potato skins.
Add 2 tablespoons butter and the cream to the potatoes and beat with an electric mixer at medium speed, until smooth.
Mix in the applesauce and ginger; season with salt and pepper
Transfer potato mixture to an ovenproof dish and bake until heated through, about 10 minutes.
Meanwhile, toss the apples with the granulated sugar in a bowl. Melt the remaining 2 tablespoons butter in a large skillet over medium heat. Add apples and cook, stirring occasionally, until apples are caramelized to a golden brown, about 10 minutes.
Remove potato mixture from the oven, top with the caramelized apples, and serve.
Note: If oven space is at a premium, cook the sweet potatoes in the microwave. Prink potatoes generously with a fork, arrange in a “spoke” configuration on a paper towel, and cook at HIGH power until soft to the touch, about 13 to 14 minutes total. Continue according to recipe directions.
Thanksgivng, man. Not a good day to be my pants. - Kevin James
Thanksgiving dinners take eighteen hours to prepare. They are consumed in twelve minutes. Hlaf-times take twelve minutes. This is not coincidence. - Emma Bombeck
On Thanksgiving Day, all over America, families sit down to dinner at the same moment - halftime. - Unknown
Thanksgiving is an emotional holiday. People travel thousands of miles to be with people they only see once a year. And then discover once a year is way too often. - Johnny Carson
I celebrated Thanksgiving in an old-fashioned way. I invited everyone in my neighborhood to my house, we had an enormous feast, and then I killed them and took their land. - Jon Stewart
My cooking is so bad my kids thought Thanksgiving was to commemorate Pearl Harbor. - Phyllis Diller
There is no sincerer love than the love of food. – George Bernard Shaw
Thanksgiving is America’s national chow-down feast, the one occasion each year when gluttony becomes a patriotic duty. –Michael Dresser
An optimist is a person who starts a new diet on Thanksgiving Day. – Irv Kupcinet
Thanksgiving is so called because we are all so thankful that it only comes once a year. - P. J. O’Rourke
There is one day that is ours. Thanksgiving Day is the one day that is purely American. –O. Henry